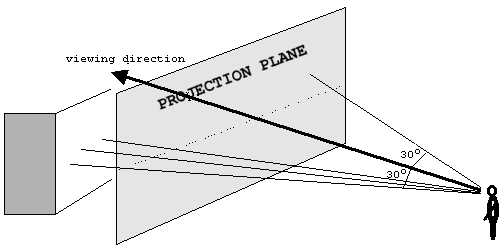
RAY-CASTING STEP 3: FINDING WALLS Notice from the previous image (Figure
11), that the wall can be viewed as collection of 320 vertical lines
(or 320 wall slices). This is precisely a form of geometrical constraints that will be suitable for ray-casting. Instead of tracing a ray for every pixel on the screen, we can trace for only every vertical column of screen. The ray on the extreme left of the FOV will be projected onto column 0 of the projection plane, and the right most ray will be projected onto column 319 of the projection plane. Figure 13: Rays looking for
walls. Therefore, to render such scene, we can simply trace 320 rays starting from left to right. This can be done in a loop. The following illustrates these steps:
2. Starting from column 0:
B. Trace the ray until it hits a wall. C. Record the distance to the wall (the distance is equal to the length of the ray). 4. Repeat step 2 and 3 for each subsequent column until all 320 rays are cast. Figure 14: This ray intersects
the grids at points A,B,C,D,E, and F.
|
||