|
 |
The "outliner" tool -or officially: the "Ink
Bottle" tool (silly name)- is perhaps one of the most-overlooked, and often-underused
drawing tool in Flash. This is too bad because this tool has the potential to produce
some nice effects.
What I'm trying to do here is just to point out some of the effects that can be done with
the tool. Just remember, that the effects shown here can be done very easily by
varying the LineStyles, LineThickness, and colors.
|
 |
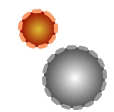
Please note that the "Ink
Bottle" property can be accessed by several ways: a) clicking the "Ink
Bottle" b) from the "DrawCircle" tool (shown on the left); c) from
the "DrawRectangle" tool. For me, I find it easier to set the property
"before" drawing the shape. |
 |
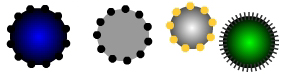
Let's draw the black button shown on the
left.
1. Click the Circle tool.
2. Select black as the outline color.
3. Select the default grayscale gradient (Flash preset).
4. Click the LineStyle pulldown and select "Custom" .
5. Set Type to Dotted.
6. Set Thickness to 8.
7. Set Dot Spacing to 3.
8. Click OK.Now draw the circle to produce
something similar to the "gear" shown on above left.
Depending on the size of the circle that you draw, the spaces
between the dots may be uneven at the endpoints. In that case, try drawing another
one with slightly different size.
|
 |
This can be done quickly and easily.
Set Line Thickness to 8.
Select "Dotted" as the line Style.
Set Dot Spacing to 3.
Draw a filled rectangle.
|
|
Line Thickness: 8
Line Style: Dotted
Dot Spacing: 1
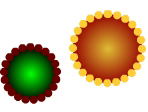
When creating shape like this, the color combination is
important. If you don't get a good combination, don't give up.
|
 |
Line Thickness: 4
Line Style: Dashed
Dash Spacing: 6 - 6
|
 |
Line Thickness: 8
Line Style: Dot
Dot Spacing: 3
|
When you experiment with the thickness, spacing, and
style, you can get something like these.
Now, you might wonder what these shapes are good for. I think
they're good candidate for buttons. |
|