 |

|
|
|
SEA WATER EFFECT |
|
|
STEP
1 |
|
|
Create a new Document, 200x200 pixels, RGB color, set
background to any color. (The size doesn't really matter, I selected that size just
for the sake of this tutorial.)
|
|
|
STEP 2 |
|
|
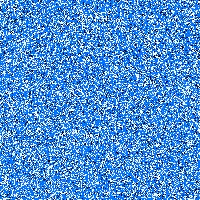
Do Filter->Noise->AddNoise.
Use Gaussian, Max Amount, non Monochomatic.
|
|
|
STEP 3 |
|
|
|
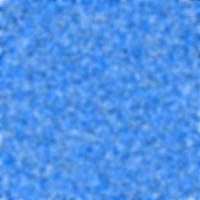
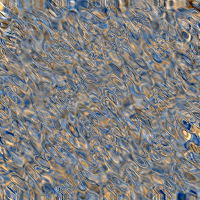
Do Image->Adjust->Hue/Saturation.
Make sure Colorize is selected. Set Hue to -149, Saturation to 100, Lightness to 0.
You should get something similar to the image on the left. |
|
|
STEP
4 |
|
|
|
Do Filter->Blur->GausianBlur.
Set the value to between 2.0 to 3.0. |
|
|
STEP
5 |
|
|
|
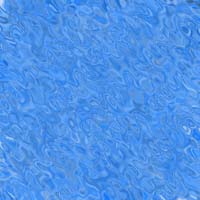
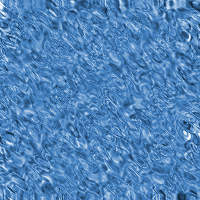
Do Filter->Ripple.
Select Medium, and set the amount to Maximum.
You should get a nice water effect as shown on the left. Before you do the next step, name the current layer:
"Flat Sea," then make a copy of the layer so that you can experiment with additional effects later.
|
|
|
STEP 6 |
|
|
|
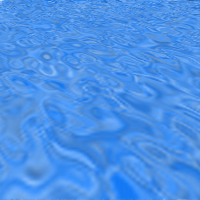
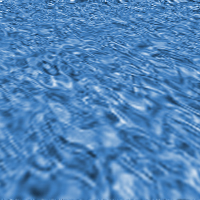
Do Layer->Transform->Perspective.
Drag the bottom-left anchor to the left until the extended length is about twice
of the image width. (Or
experiment with any setting you like.) That will do it, and here's what I ended up with: a nice calm sea water.
In the following steps, I'm showing a slightly
different effect that can be accomplished, you can either stop here or
continue.
|
|
|
STEP
7 (OPTIONAL) |
|
|
|
Activate the saved Layer named Flat
Sea that you create in STEP 5.
Do Filter->Emboss.
Select Max Height, Amount 160, set angle to 90 degree.
|
|
|
STEP 8 (OPTIONAL) |
|
|
|
Do Image->Adjust->Hue/Saturation.
Make sure Colorize is selected. For the image shown on the left, I selected Hue
of -153, Saturation of 0, and Lightness of 0, but you can try different setting and find what you like.
For now, though, try to stick to Hue
values between -110 to -170. |
|
|
STEP
9 (OPTIONAL) |
|
|
|
Adjust the perspective as you did in Step 6. Now we're done, here's the wild sea water. |
|
|
|
|
|
permadi@permadi.com
Copyright F. Permadi
<<INDEX>> |
|