FLASH: CHECKERBOARD TRANSITION EFFECT
Please wait until the picture loads.
OVERVIEW
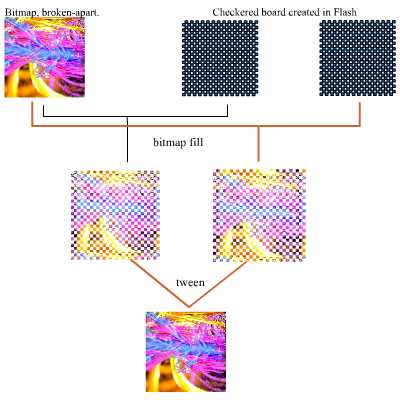
This effect can be accomplished by using bitmap fill. The bitmap fill is applied into a checkered board pattern. Motion Tween is then applied to the pattern to create the fade effect.
STEP BY STEP TUTORIAL
A. Importing the bitmap.
A1) Import the bitmap to be used (File » Import).B. Creating the Checkerboard.
B1) Create a new Graphic symbol, name it myMosaic. From this step onward, we'll edit this symbol.B2) Go to the menu View » Grid, then turn on Show Grid and Snap To Grid.

B3) Go back to that menu, and select Edit Grid. Set the grid size to the desired grid size. I chose 8, this is the smallest value you can set it to in Flash 5.
B4) Draw a square 8 by 8 pixel (or whatever grid size you chose), with the center point at 0,0. (To make the top-left point at 0,0, on the Info menu, click the top-left square that I marked - see illustration below.)
B5) Duplicate this square (copy and paste) and line up several of them, evenly spaced. The amount of space between should be the same as the grid size. (If you have turned on Snap to Grid in Step 1, then this should be easy. Click the duplicate, then click the top-left area of the square when you start to drag. A snapping-circle will appear, and this circle will snap into intersection points, exactly where you'd want it.)
.
B6). Keep copying the square until you have 6 or so of them.
B7) Form a two-rows checkerboard pattern. (To do that, just do copy all of the squares you already got, and paste them at once. If you have trouble lining the squares up with even spacing, click the top-left area of the square when you start to drag, do not start draging until you see the snapping-circle.
Below is an illustration of the wrong way to line up.
The correct way.
The result:
B8) And then just do copy all of the one you already got, and paste them at once, then 20 at once, and so on. Keep doing this until you have enough squares to cover the image.
C. Filling the Checkerboard with Image
C1) While still in myMosaic symbol, make sure you have the Library window open.
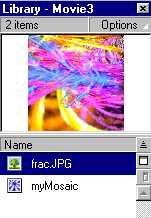
C2) From the Library, drag the image you imported to the stage, but don't cover the checkerboard. The image should be on the same layer as the checkerboard.
C3) Click on the image, then do Modify » Break Apart. Breaking apart the image allow the image to be used as "paint."Please follow the next steps carefully. Ss these are rather tricky, I suggest saving the movie now! If you make a mistake, you might end up with something like below.
C4) Click the Eyedropper tool, then click the image. If you do this correctly, you should see the miniature of the image on the "active paint" panel.
C5) Deselect everything (Edit » Deselect All)
C6) Click the layer where the checkerboard is located.
C7) Meanwhile, while you're doing step C6, the Paint Bucket tool should still be active and the tool panel should look like below (if not, then reload, and repeat from step C4:
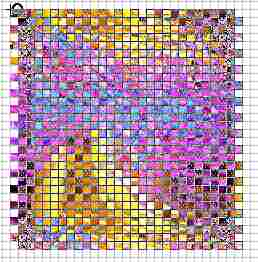
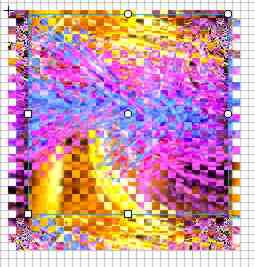
C8) Click on one of the square on the checkerboard (pick a square in the middle). This will paint selected item (the whole checkerboard) with the picture. If everything went well, this is what the checkerboard should look like now.
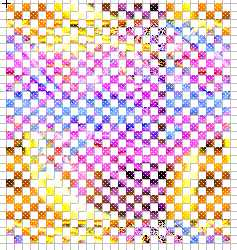
D9) Now you can delete the imported image from the stage, don't delete the checkerboards.
D. Making the Second Checkerboard
D1) While still in myMosaic symbol, make a new layer.
D2) Select all of the checkerboard, then copy it into the new layer. You should have 2 checkerboards now.
D3) What we need to do now is to position the new checkerboard so that it fills the gaps on the other board. (Again, make sure the Snap to Grid is still on, select all of the second checkerboard, then drag the "corner" of one of the selected square to position it.) As you see below, the result doesn't always form a perfect match, but don't worry about it for now.
E. Matching/Aligning the Checkerboard PatternE1) While still in myMosaic symbol, click the Eyedropper Tool, and then "sample" the checkerboard by clicking on it.

E2) The active tool should changed into Paint Bucket. Click the Transform Fill icon.
Note: The Transform Fill enables user to align "fills." In this case, you can think of the checkerboards as if it has been pasted with wallpaper (albeit with holes on it). We need to line up the wallpaper on the two checkerboards to form a perfect picture.
E3) With the Transform Fill active, click on the checkerboard, you should be presented with a square denoting the "fill alignment." You can move the square by dragging the circle in the middle of the square. At this point, move the square so that it's completely inside the checkerboard. Again, it is very important to have Snap to Grid active at this time, otherwise lining this up will be very hard.
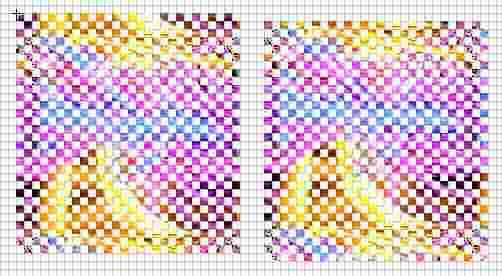
E4) Do the same with the second checkerboard. This time, you want to align the second checkerboard so the picture forms a perfect match. (You might need to lock the other layer to avoid aligning the checkerboard that you've already worked on.)
E5) Notice that my checkerboard is bigger than the image. This can be cleaned up easily by deleting the squares outside the picture boundary.
F. Turning the Checkerboards into Symbols
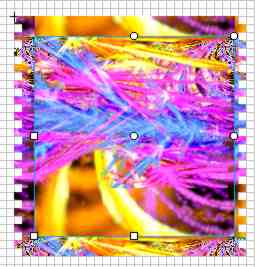
At this point, you should have 2 checkerboards perfectly matching each other. In the following step, we will turn each checkerboard into a symbol. By doing this, we will be able to do transformation on it.
E1) While still in myMosaic symbol, hide one of the layer, you should see the checkerboard pattern again. Then select the visible checkerboard, and Convert it to Symbol (Modify » Convert to Symbol).
Name it and set behavior to Graphic.
E2) You need to convert the other checkerboard into symbol, too. To do that, hide the active layer, and then unhide the previously hidden layer. Then select the visible checkerboard, and Convert it to Symbol (Modify » Convert to Symbol). So now you have 2 Symbols.
F. Creating the Tween
F1) While still in myMosaic symbol, create a key frame at frame 30 (this is arbitrary number - bigger number means slower transition). Do this for both layers.
F2) Insert Motion Tween on both layers. I.e.: click frame 10, then open the Frame Property window (Window > Panels > Frame) and select Motion Tween.
Save the movie (name it something new.)
Now, we're ready to roll out the effect.
Click here for CHECKERBOARD FADE EFFECT
Click here for CHECKERBOARD SLIDING/SPIN EFFECT<<MORE TUTORIALS>>
(C) 2002 F. Permadi